SDN image: An SDN image encapsulates an SDN software and can be used
to create SDN instances.
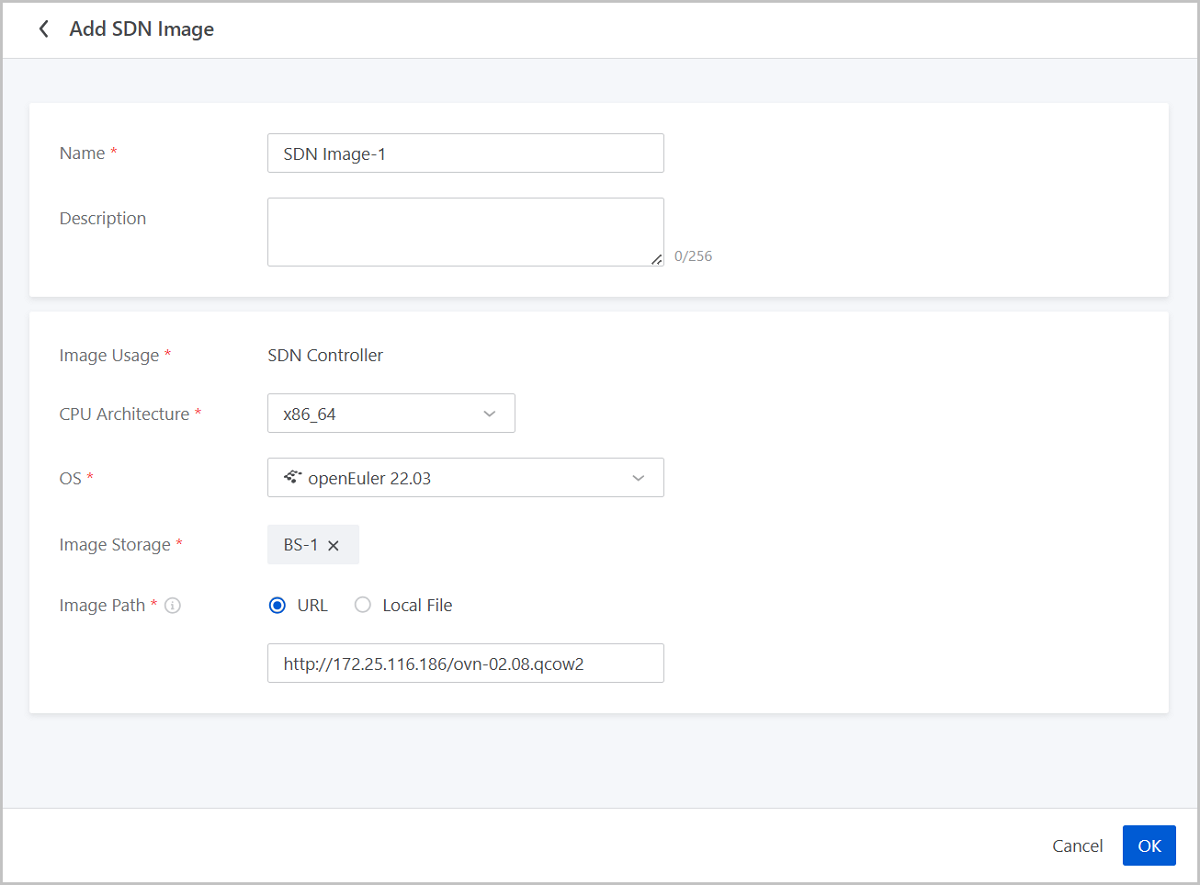
Add an SDN Image
On the main menu of ZStack Cloud, choose Resource Center > Network Resource > SDN Device > SDN Image. On the SDN Image page, click Add SDN
Image. Then, the Add SDN Image page is
displayed.
On the displayed page, set the following parameters:
Name: Enter a name for the SDN image.
Description: Optional. Enter a description for the SDN
image.
Image Usage: Display SDN instance.
CPU Architecture: Select a CPU architecture for the SDN
image. SDN instances created from the SDN image inherit this architecture.
OS: Select a OS for the SDN image. Supported OS types
vary from different CPU architecture.
Image Storage: Select an image storage to store the SDN
image.
Image Path: Enter a URL or upload a local file.
URL: Enter the download URL of the SDN
image.
Local File: Upload an SDN image that can directly be accessed by the browser.
Note: A local browser will serve as a transmission relay used for uploading the image. Do not refresh or stop the current browser, nor stop your management node. Otherwise, you will fail to add the image.
Figure 1. Add SDN Image
Manage an SDN Image
On the main menu of ZStack Cloud, choose Resource Center > Network Resource > SDN Device > SDN Image. Then, the SDN Image page appears.
The following table lists the actions that you can perform on an SDN image.
Action
Description
Add SDN Image
Add an SDN image.
Edit Name and Description
Edit the name and description of an SDN
image.
Enable SDN Image
If enabled, the SDN image is available as a
candidate when you create an SDN instance.
Disable SDN Image
If disabled, the SDN image is no longer available
as a candidate when you create an SDN instance.
Delete SDN Image
Delete an SDN image.
Note:
Deleting an SDN image may cause SDN instance creation failure. Proceed with caution.
If an SDN image is referenced by an SDN cluster, then you cannot delete the SDN image. Delete the SDN cluster first before performing this action.
 Note: A local browser will serve as a transmission relay used for uploading the image. Do not refresh or stop the current browser, nor stop your management node. Otherwise, you will fail to add the image.