VM Security
Configure and Manage a Standard Key Provider
Add a Standard Key Provider
You can add an external key server (KMS) to support various encryption capabilities of the system, thereby enhancing overall system security. The KMS must support the Key Management Interoperability Protocol (KMIP) 1.1 or later.
Before you begin
Make sure the platform is installed with a valid Advanced Edition license.Procedure
- In the navigation pane, select .
- Select the root node.
- On the root node details page, click Key Providers.
- On the Key Providers tab, click Add Key Provider.
-
In the Add Key Provider dialog, set the following parameters:
- Name: Enter a name for the key provider.
 Note: The name of each key provider serves as its identifier. Ensure the name is globally unique.
 - Description: Enter a brief description for the key provider.
- Type: Select Standard Key Provider.
- IP Address/Domain Name: Enter the IP address or domain name of the KMS.
- Port: Enter the connection port of the KMS. The default port is 5696.
- Password Protection: Some KMS systems allow you to isolate encryption keys used by different users or groups by specifying a username and password. Enable this option and enter the corresponding username and password.
- Name: Enter a name for the key provider.
- After you confirm the configuration details are correct, click OK.
-
Click Trust.
After the key provider is added successfully, its status shows as "Connected | Not Trusted by KMS".
What to do next
- After you add a standard key provider, you must establish two-way trust for it to work properly. For more information, see Establish Trust.
- Scenario practices: Use the Thales Key Provider, Use the HashiCorp Key Provider
Establish Trust
Make KMS Trust ZStack ZSphere
Use KMS Certificate and Private Key to Make KMS Trust
Some KMS vendors require you to upload the KMS server certificate and private key to ZStack ZSphere.
Procedure
- Navigate to the Key Providers page.
- Locate the standard key provider with which you want to establish trust, and click .
- In the Make KMS Trust the Platform dialog, select KMS Certificate and Private Key as the trust method.
- Click Next.
- Upload the certificate and private key files you received from the KMS, or paste the certificate and private key content into the text box.
- Click OK.
What to do next
To establish two-way trust, see Make ZStack ZSphere Trust the KMS.Use the New Certificate Signing Request (CSR) to Make KMS Trust
Some KMS vendors require ZStack ZSphere to generate a Certificate Signing Request (CSR) and submit the CSR to the KMS. The KMS signs the CSR and returns a signed certificate. You must upload the signed certificate back to ZStack ZSphere to establish trust.
Procedure
- Navigate to the Key Providers page.
- Locate the standard key provider with which you want to establish trust, and click .
- In the Make KMS Trust the Platform dialog, select New Certificate Signing Request (CSR) as the trust method.
- Click Next.
-
Click Copy or Download to copy the entire content from the text box or save it as a file.
Use Generate New CSR only when you explicitly need to create a new CSR.
- Click OK.
- Log in to the KMS and submit the CSR according to the KMS requirements.
- After you receive the certificate signed by the KMS, click again.
- Paste the signed certificate into the text box, or click Upload File to upload it.
What to do next
To establish two-way trust, see Make ZStack ZSphere Trust the KMS.Make ZStack ZSphere Trust the KMS
If you skipped the step of trusting the KMS when you added the standard key provider, you must establish two-way trust after the KMS trusts ZStack ZSphere.
Procedure
- Navigate to the Key Providers page.
- Locate the standard key provider with which you want to establish trust, and click .
-
Select one of the following options from the Establish Trust menu.
- Make the Platform Trust KMS: In the Make the Platform Trust KMS dialog, click Trust.
- Upload KMS Certificate: In the Upload KMS Certificate dialog, upload a file or paste the certificate content into the text box. Then click OK.
Delete a Standard Key Provider
Before you begin
- When multiple key providers exist, the default key provider cannot be deleted. Set another key provider as the default first, and then perform the deletion.
- To preserve encrypted resources, perform the Update Key operation on the relevant virtual machines before deletion, and re-encrypt them using the default key provider.
Procedure
- In the navigation pane, select .
- Select the root node.
- On the root node details page, click Key Providers.
-
On the Key Providers tab, select the standard key provider you want to delete, and then click .
Note: After you delete a key provider, all resources encrypted with this key provider (such as TPM-enabled virtual machines, encrypted virtual machines, and encrypted disks) will enter a locked state and become inaccessible.
- Read the risk warning, enter the confirmation information, and click OK.
Use the Thales Key Provider
About this task
- Add the Thales key provider in ZStack ZSphere
- Create a localhost user in Thales and add it to the admin group
- (Optional) Use the New Certificate Signing Request (CSR) method to make Thales trust ZStack ZSphere
- (Optional) Use the KMS certificate and private key method to make Thales trust ZStack ZSphere
Procedure
-
Add the Thales key provider in ZStack ZSphere.
For detailed steps, see Add a Standard Key Provider.
-
Create a localhost user in Thales and add it to the admin group.
-
Click .
图 1. Add a User 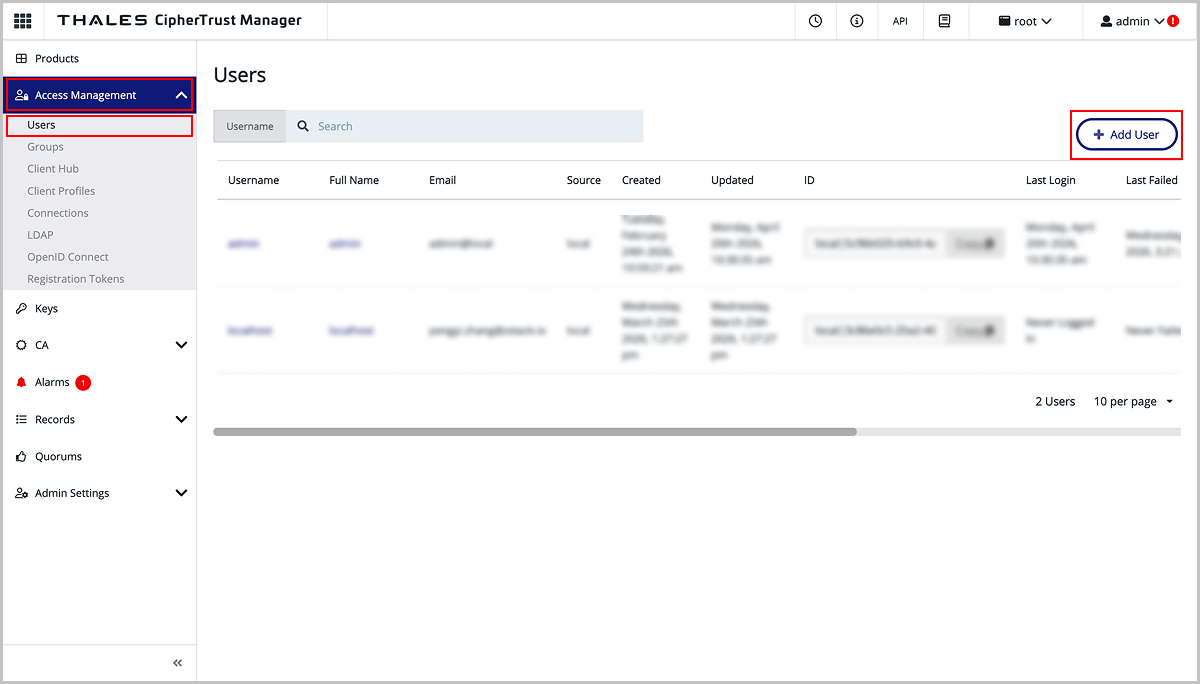
-
Create the localhost user.
图 2. Create the localhost User 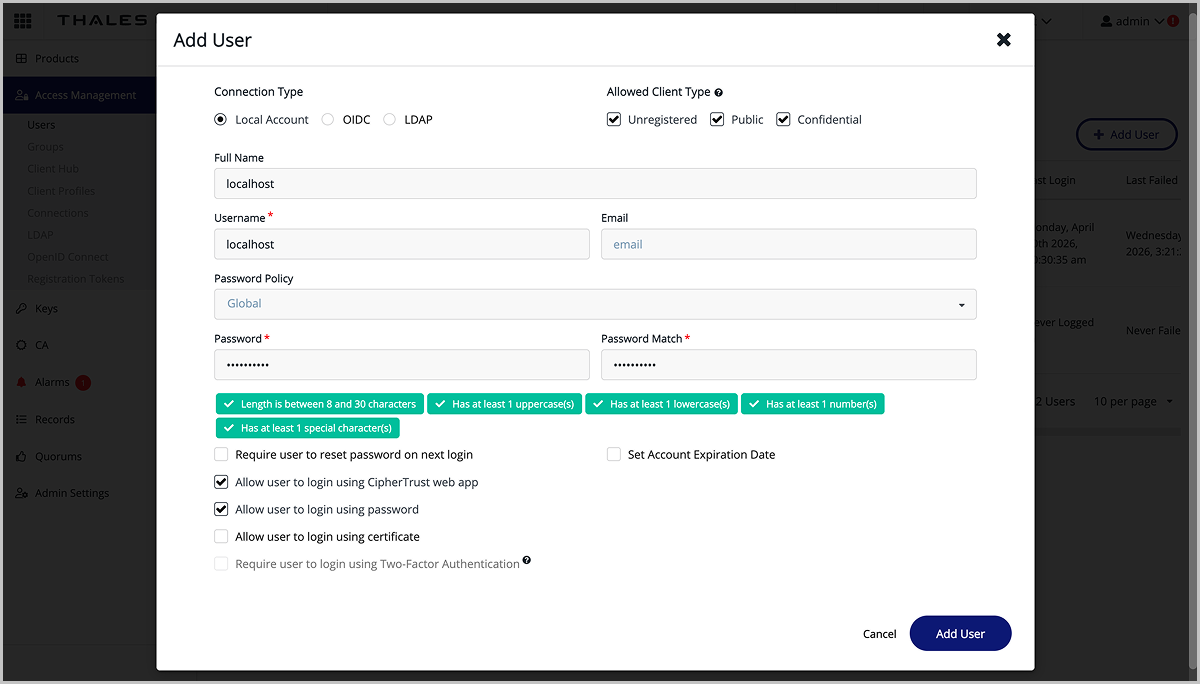
-
Expand the GROUP MEMBERSHIP section, and then click Add Group.
图 3. Add the User to a Group 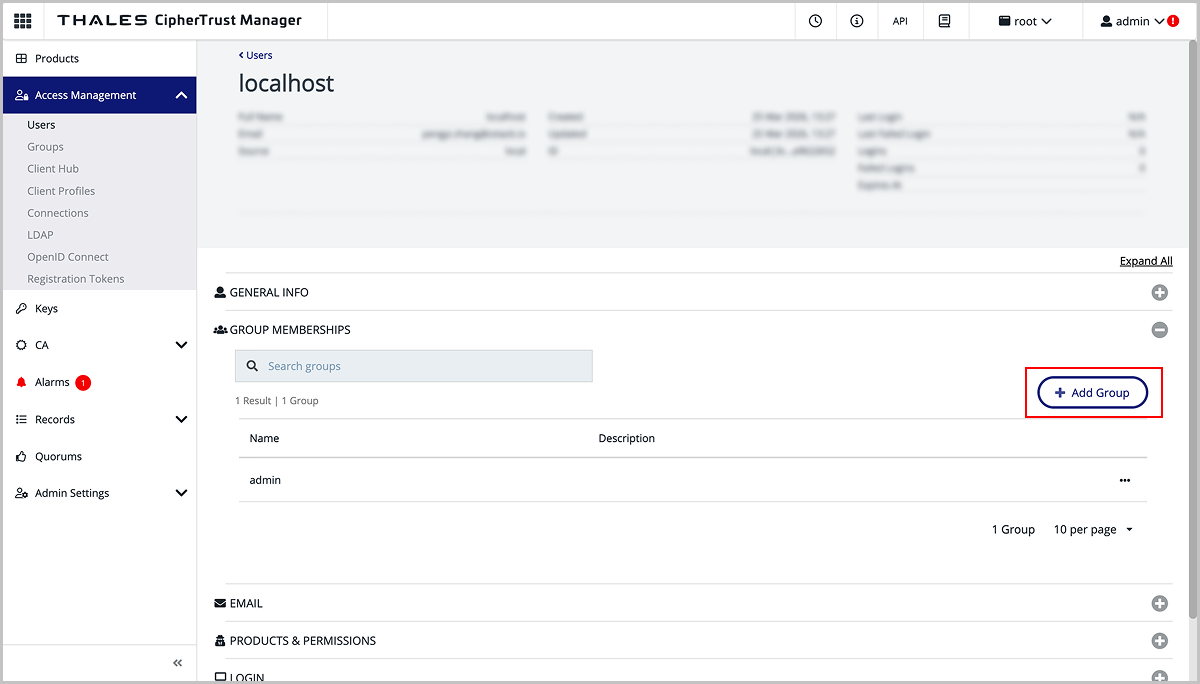
-
Click .
-
(Optional) Use the New Certificate Signing Request (CSR) method to make Thales trust ZStack ZSphere.
-
Click .
图 4. Access the KMIP Module 
-
Click .
图 5. Add a Profile 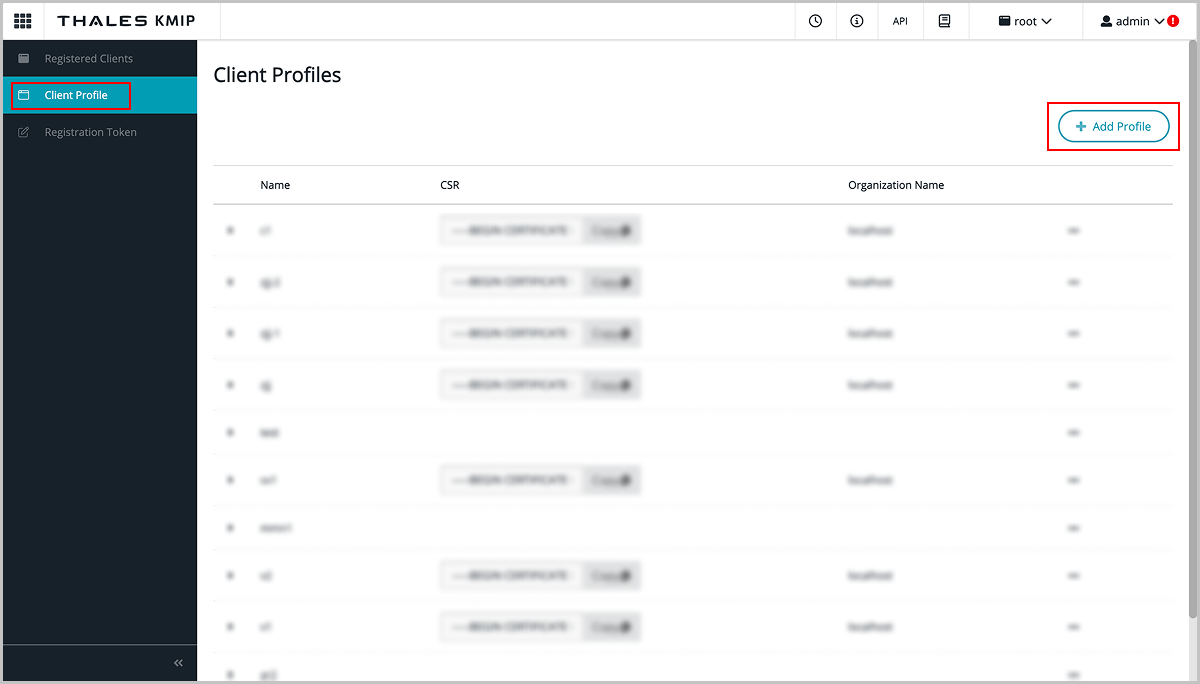
-
In the Add Profile dialog, set the profile basic information, paste the CSR information, and then click Save.
图 6. Configure the Profile 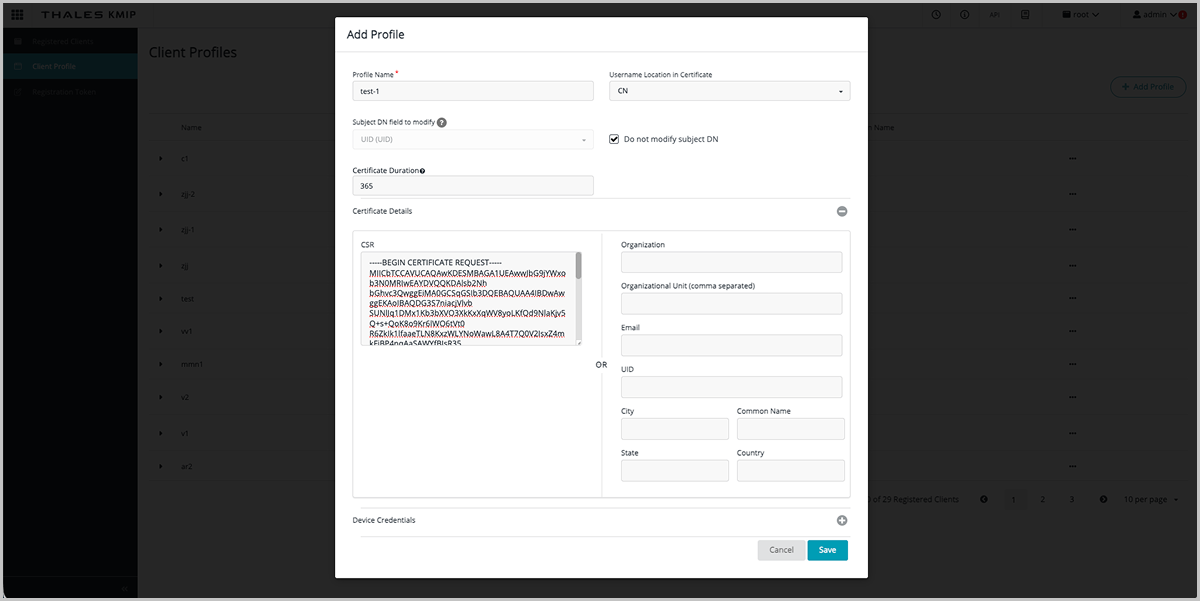
-
Click .
图 7. New Registration Token 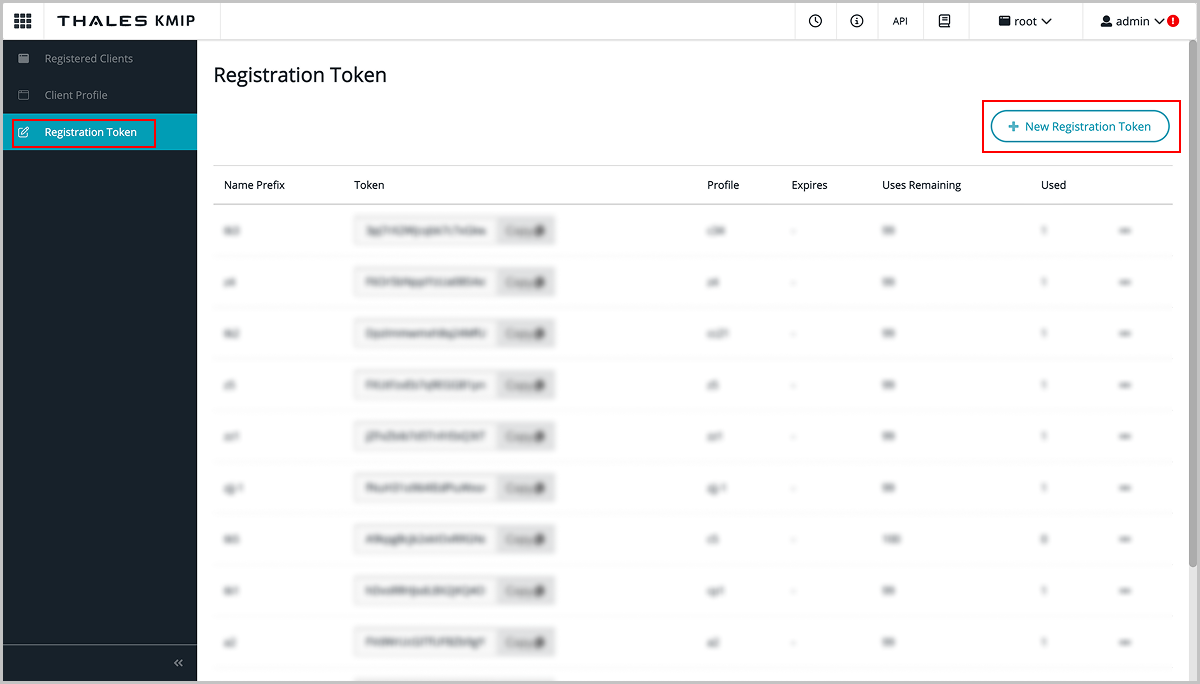
-
In the Create New Registration Token dialog, follow the wizard to complete the configuration.
- In step 3 Select Profile, select the profile you created earlier.
- In step 4 Create Token, copy the generated token.
图 8. Create a Token 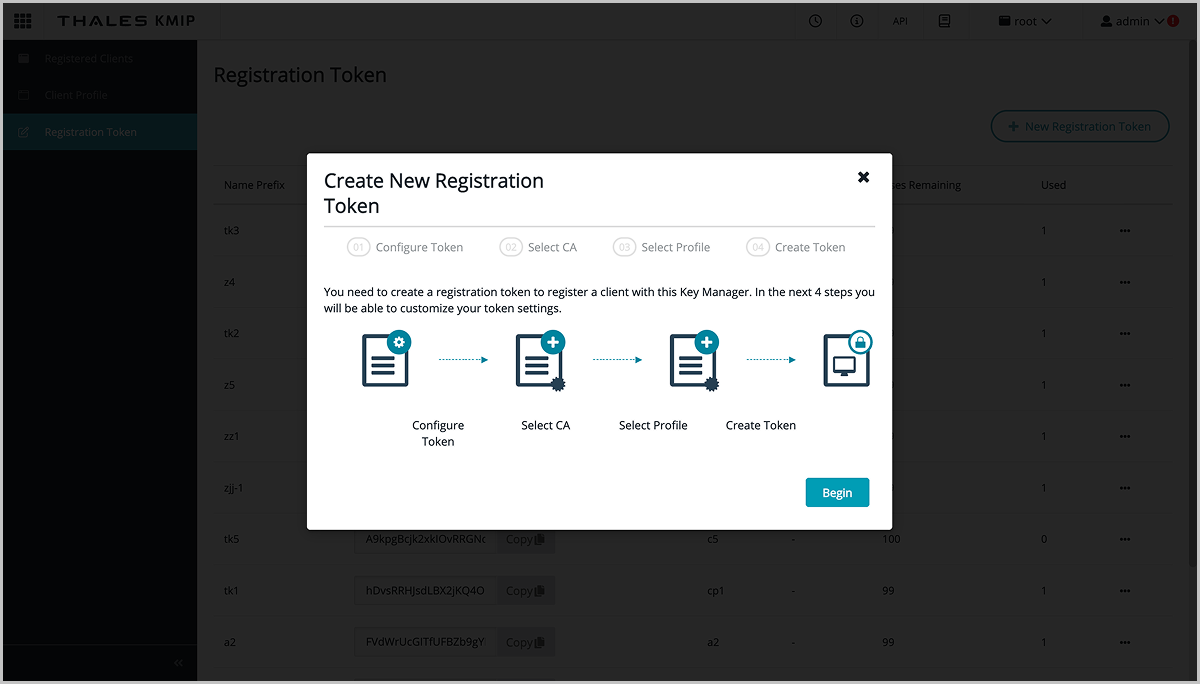
-
Click .
图 9. Add a Client 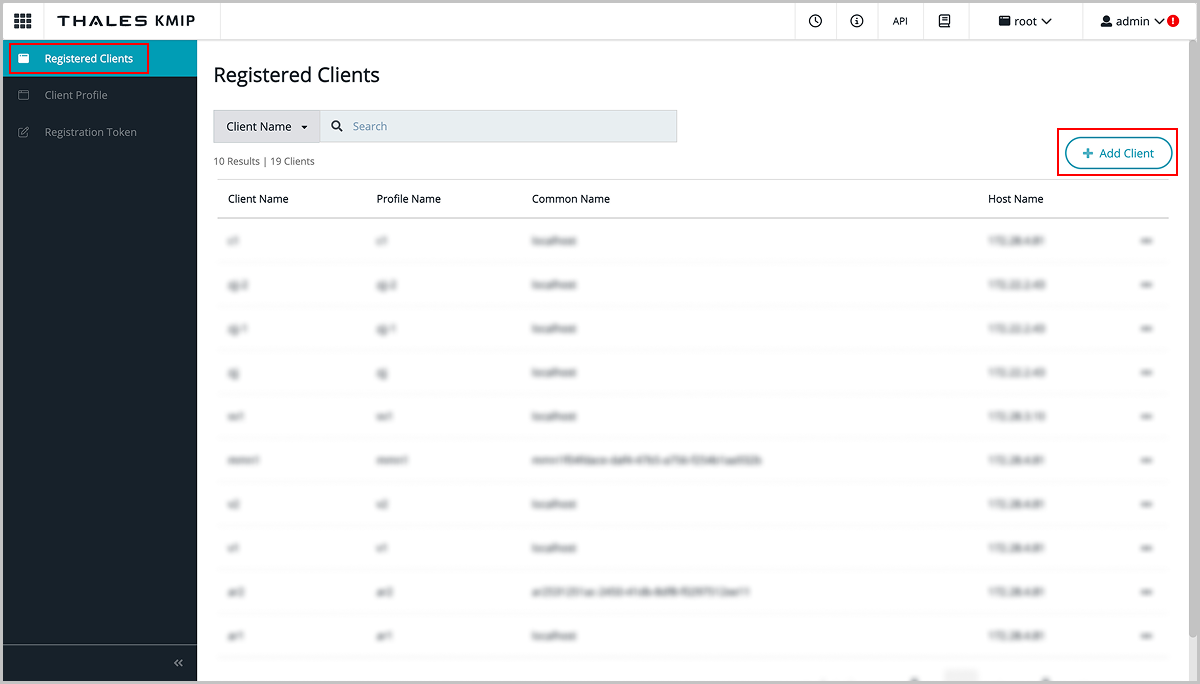
-
In the Add Client dialog, set the client name, paste the registration token, and then click Save.
图 10. Configure the Client 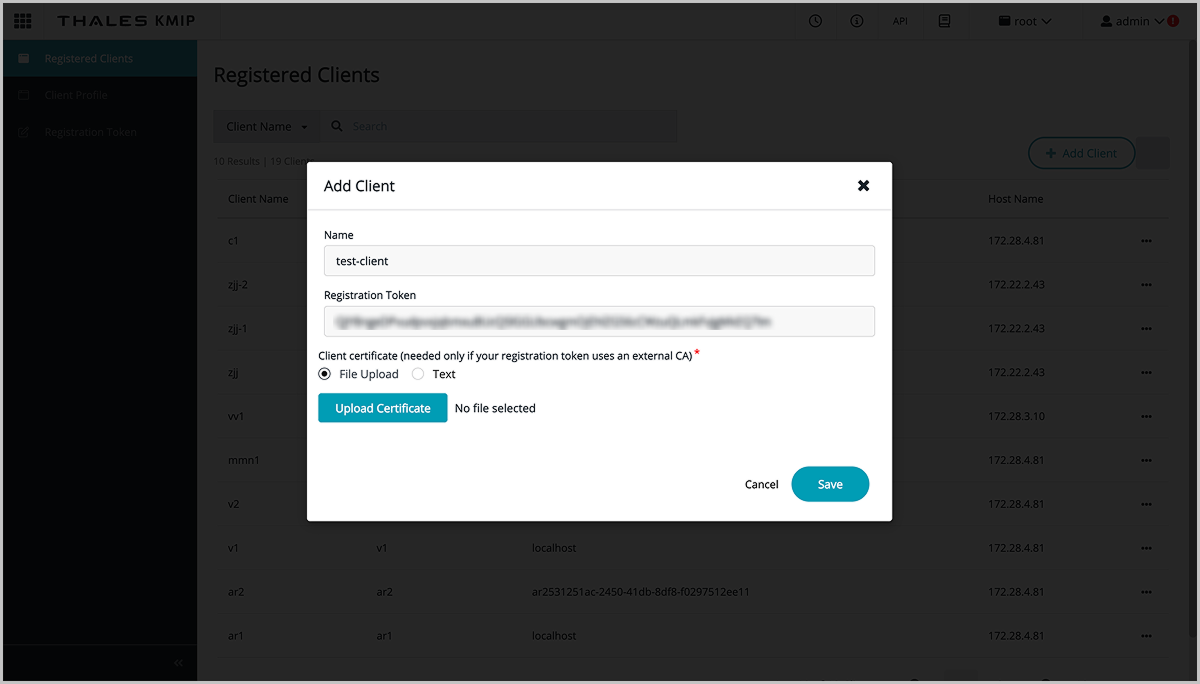
-
After saving successfully, click Save CSR and Save Certificate to download the CSR and certificate.
图 11. Download the CSR and Certificate 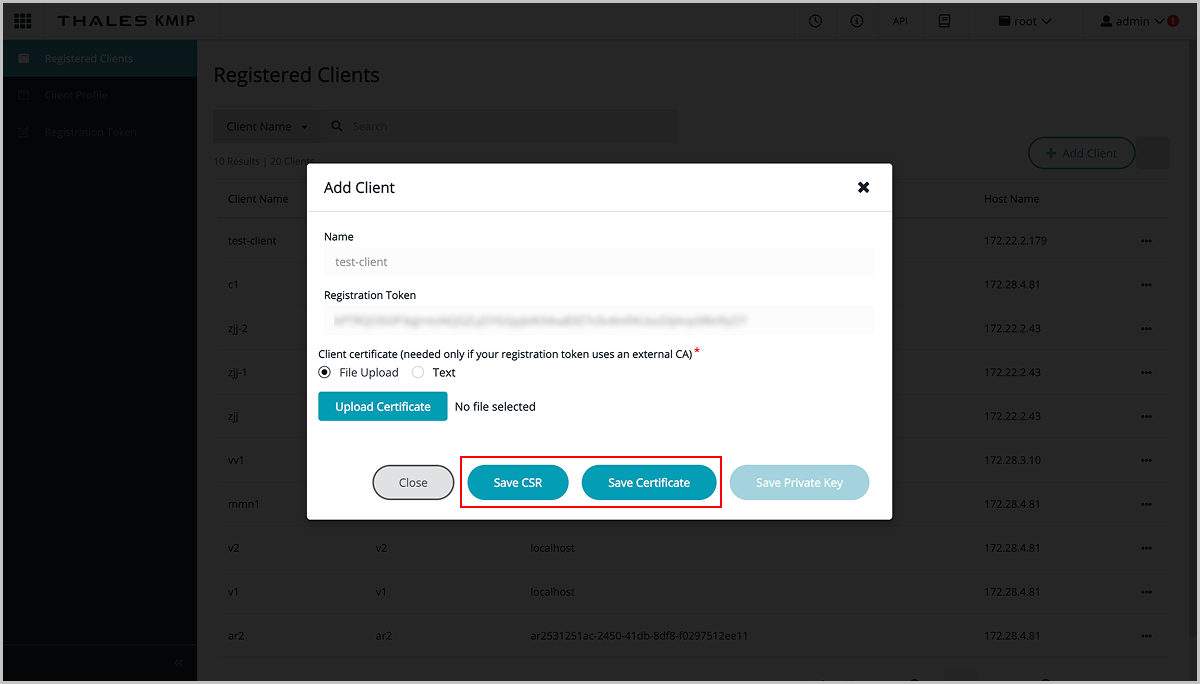
-
Click .
-
(Optional) Use the KMS certificate and private key method to make Thales trust ZStack ZSphere.
-
Click .
图 12. Access the KMIP Module
-
Click .
图 13. Add a Profile
-
In the Add Profile dialog, set the profile name, and then click Save.
图 14. Add a Profile 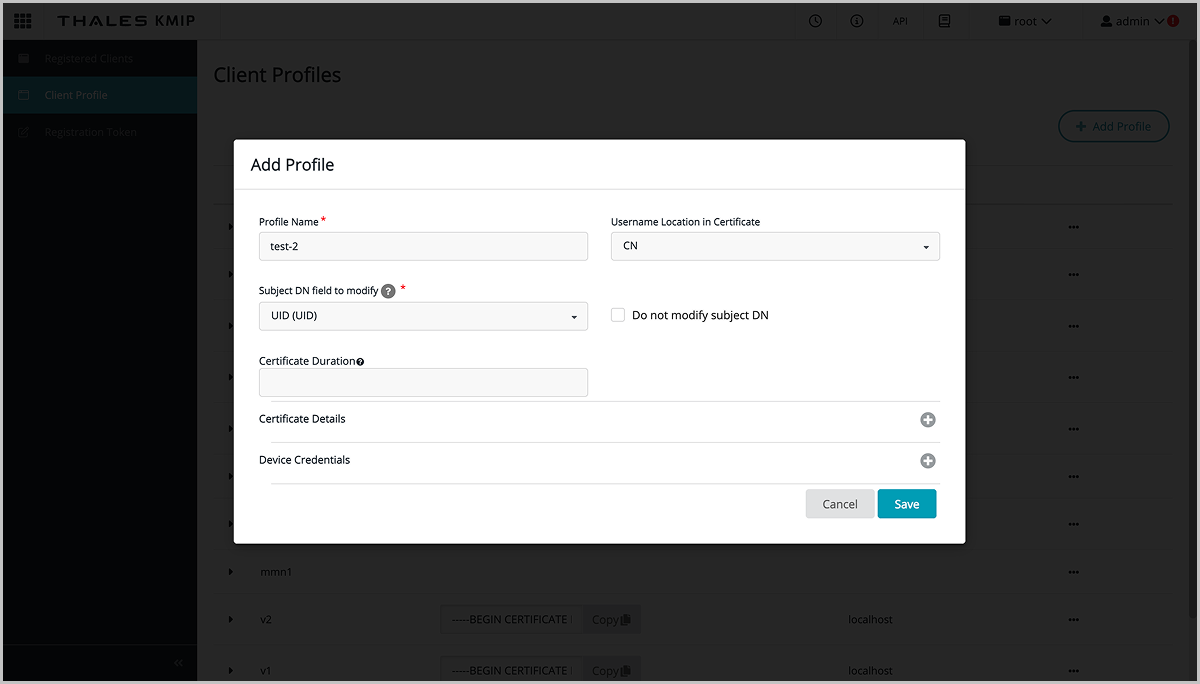
-
Click .
图 15. New Registration Token
-
In the Create New Registration Token dialog, follow the wizard to complete the configuration.
- In step 3 Select Profile, select the profile you created earlier.
- In step 4 Create Token, copy the generated token.
图 16. Create a Token
-
Click .
图 17. Add a Client
-
In the Add Client dialog, set the client name, paste the registration token, and then click Save.
图 18. Configure the Client
-
After saving successfully, click Save Certificate and Save Private Key to download the certificate and private key.
图 19. Download the Certificate and Private Key 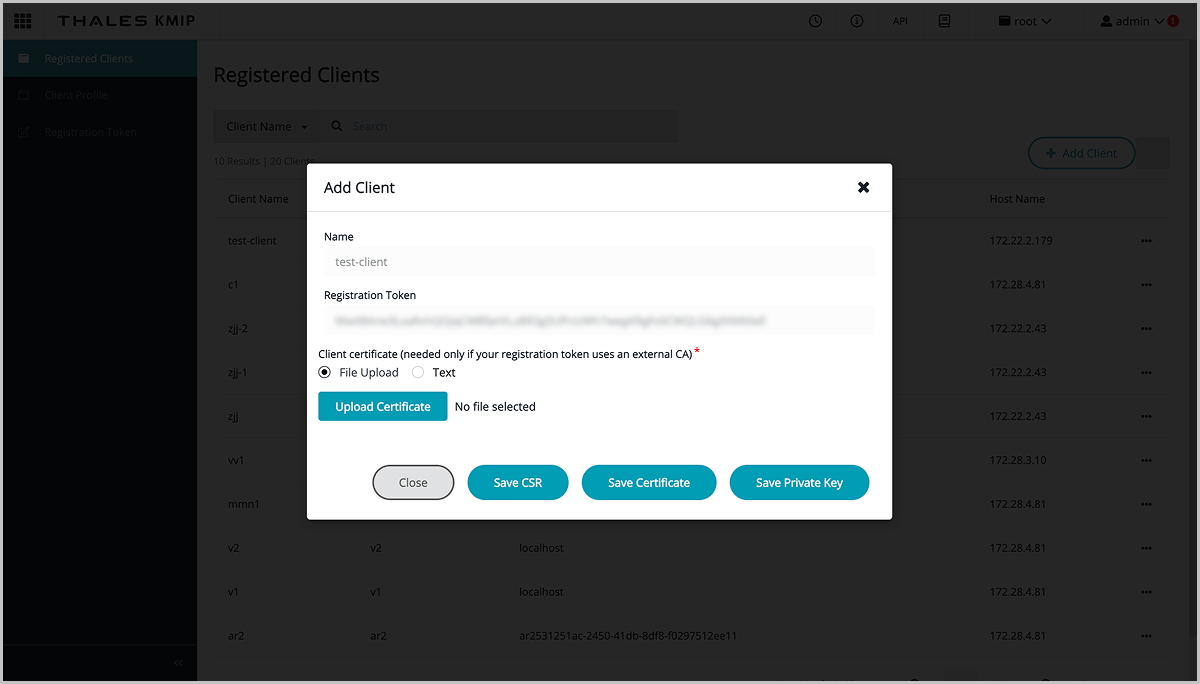
-
Click .
Use the HashiCorp Key Provider
About this task
Procedure
-
Add the HashiCorp key provider in ZStack ZSphere.
For detailed steps, see Add a Standard Key Provider.
-
(Optional) Use the KMS certificate and private key method to make HashiCorp trust ZStack ZSphere.
-
On the Secrets Engines page, click kmip to access the KMIP module.
图 1. Access the KMIP Module 
-
On the kmip page, click Create scope to create a scope or enter an existing one.
图 2. Create or Enter an Existing Scope 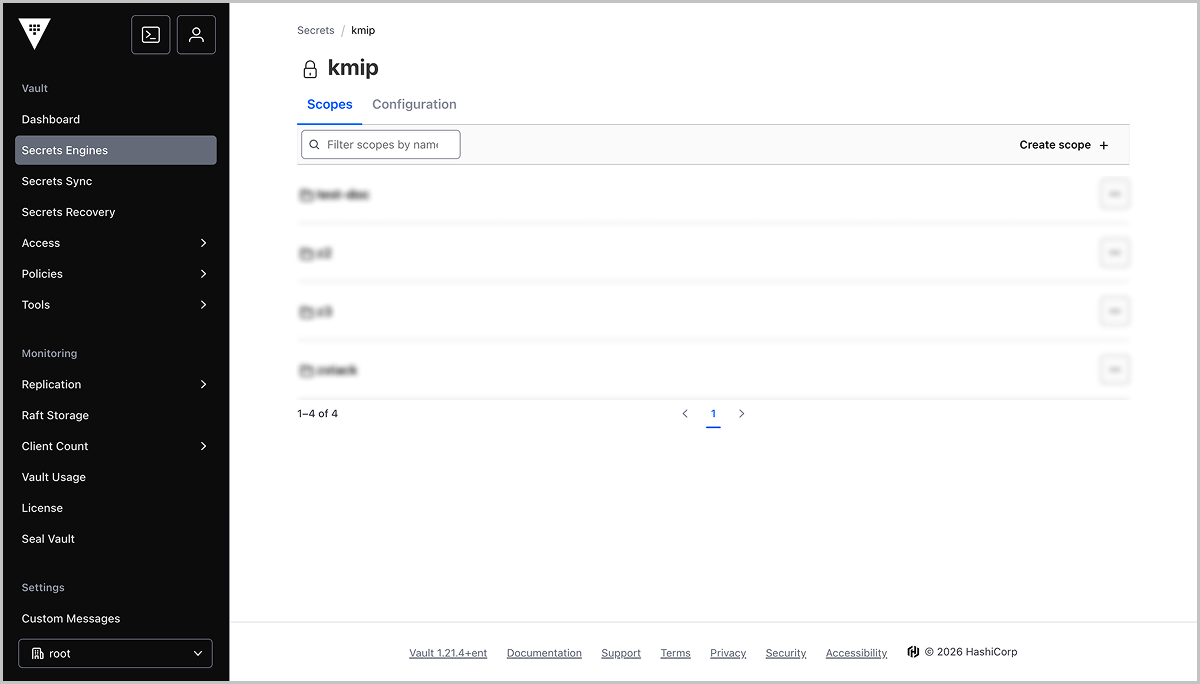
-
On the Create a Role page, set the role name and complete the TLS configuration by referring to the example.
图 3. Create a Role 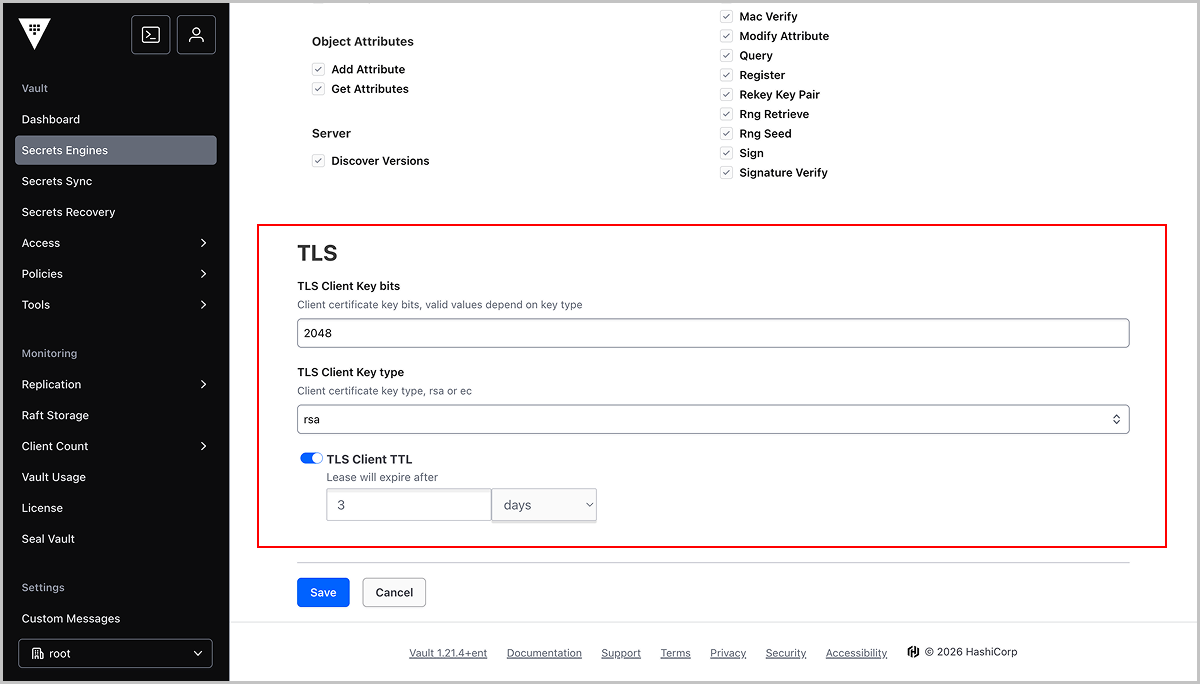
-
On the Generate Credentials page, select pem as the certificate format, and then click Save.
图 4. Generate a Certificate 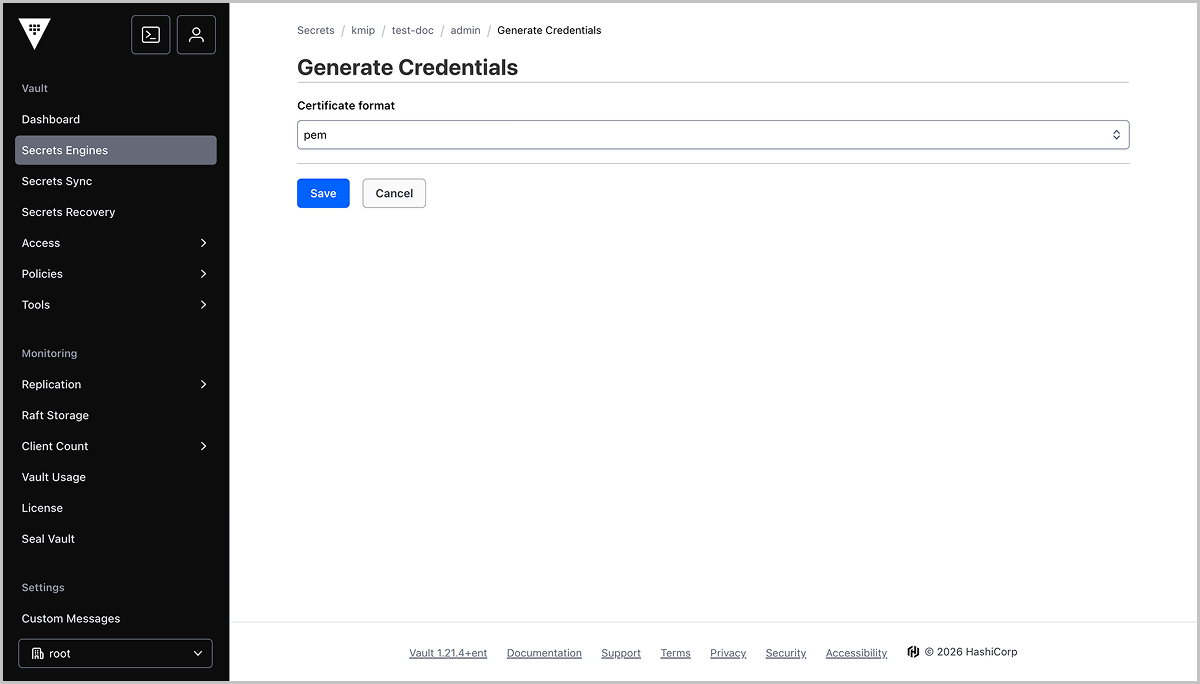
-
Copy the certificate and private key.
图 5. Copy the Certificate and Private Key 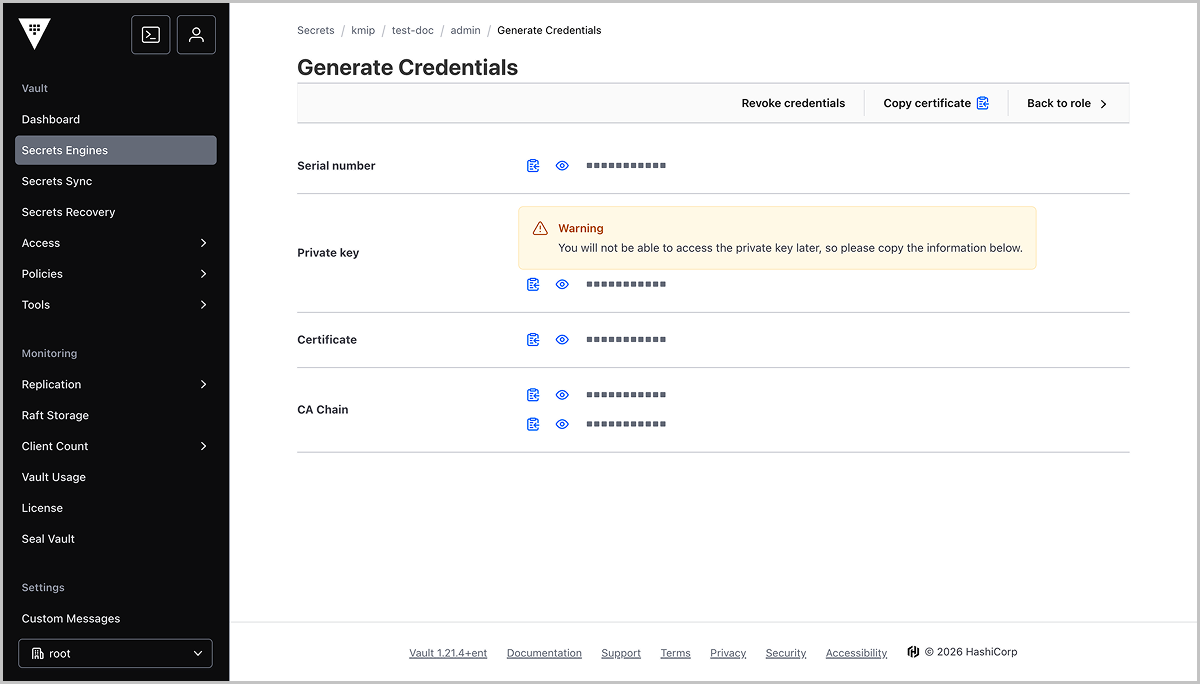
-
On the Secrets Engines page, click kmip to access the KMIP module.
-
(Optional) Use the New Certificate Signing Request (CSR) method to make HashiCorp trust ZStack ZSphere.
Configure and Manage a Native Key Provider
Add a Native Key Provider
ZStack ZSphere provides a native key provider that allows you to enable encryption-related features without a third-party KMS.
Procedure
- In the navigation pane, select .
- Select the root node.
- On the root node details page, click Key Providers.
- On the Key Providers tab, click Add Key Provider.
-
In the Add Key Provider dialog, set the following parameters:
- Name: Enter a name for the key provider.Note: The name of each key provider serves as its identifier. Ensure the name is globally unique.
- Description: Enter a brief description for the key provider.
- Type: Select native Key Provider.
- Name: Enter a name for the key provider.
-
Click OK.
After the key provider is added successfully, its status shows as "Not Backed Up".
What to do next
After you add a native key provider, you must back it up before use. For more information, see Back Up the Native Key Provider.Back Up the Native Key Provider
The native key provider is stored only in ZStack ZSphere. If ZStack ZSphere fails or needs to be rebuilt, the key is lost and all encrypted virtual machines cannot be decrypted or started. Therefore, backing up the native key provider is necessary for disaster recovery. After you back it up, you can restore key services and remount encrypted virtual machines after you rebuild ZStack ZSphere.
Procedure
- In the navigation pane, select .
- Select the root node.
- On the root node details page, click Key Providers.
-
On the Key Providers tab, select the native key provider you want to back up.
For key providers that are not yet backed up, the status shows as "Not Backed Up".
- Click .
-
In the Back Up Key Provider dialog, select the backup mode as needed.
- Without Password ProtectionNote: Without password protection, the configuration data and the virtual machines encrypted with this key provider face potential security risks.
- Password Protection: Enter and confirm the password.Note:
Store the password in a safe place. The platform cannot access or recover the password you set. Make sure this password is securely saved, as it will be required to restore the Native Key Provider configuration in case of disaster.
If you forget or lose the password:- You cannot restore the key provider.
- You cannot access encrypted resources (such as TPM-enabled virtual machines and encrypted virtual machines) that depend on this key provider.
- Without Password Protection
-
Click OK.
The backup file is downloaded through your browser. Save the backup file in a secure location.
Restore the Native Key Provider
Before you begin
- You have prepared the backup file of the native key provider.
- If you set password protection for the backup file when you backed up the key provider, prepare the password for the backup file.
- Ensure that no key provider with the same name exists on the platform.
Procedure
- In the navigation pane, select .
- Select the root node.
- On the root node details page, click Key Providers.
- On the Key Providers tab, click .
- In the Restore Key Provider dialog, upload the backup file.
- (Optional) If the backup file is password-protected, enter the password.
- Click Next.
- Confirm the information of the key provider to restore, and then click OK.
Delete the Native Key Provider
Before you begin
- If you want to keep the key provider for future use, back it up first.
- To preserve encrypted resources, perform the Update Key operation on the relevant virtual machines before deletion, and re-encrypt them using the default key provider.
Procedure
- In the navigation pane, select .
- Select the root node.
- On the root node details page, click Key Providers.
-
On the Key Providers tab, select the native key provider you want to delete, and then click .
Note:
- After deletion, all resources encrypted with this key provider (such as TPM-enabled virtual machines, encrypted virtual machines, and encrypted disks) will enter a locked state and become inaccessible.
- The key provider is permanently deleted from the platform and cannot be recovered. Proceed with caution.
- Read the risk warning, enter the confirmation information, and click OK.
Rekey
For business or compliance requirements (such as regular key rotation, suspected key leakage, or meeting security audit standards), you can update the key and re-encrypt encrypted virtual machines using the default key provider.
Procedure
- In the navigation pane, select .
- Select the root node.
- On the root node details page, click Key Providers.
- On the Key Providers tab, click .
-
In the Rekey dialog, click OK.
This operation re-encrypts all encrypted resources using the new key from the current default key provider.
Secure VMs with vTPM
When you create a new virtual machine or add a virtual Trusted Platform Module (vTPM) to an existing virtual machine, you provide enhanced security for the virtual machine operating system.
Before you begin
- The platform has an available key provider. If you use the native key provider, back it up first.
- The host on which the VM runs must meet the vTPM support requirements for kernel, QEMU, and libvirt versions. The following table lists the required component versions for each architecture and host operating system version:
Architecture Host OS version Kernel version QEMU version libvirt version x86 H84r 4.18.0-553.69.1.13.gc220c6303994.el8.x86_64qemu-kvm-6.2.0-235.g51749aa16b.el8libvirt-8.0.0-90.g4f8dd1cb01.el8.x86_64KY10 SP3 4.19.90-52.48.v2207.ky10.x86_64qemu-kvm-6.2.0-235.g51749aa16b.ky10libvirt-8.0.0-90.g4f8dd1cb01.ky10.x86_64KY10 SP3.2403 4.19.90-89.25.v2401.ky10.x86_64qemu-kvm-6.2.0-232.g09252161d1.ky10libvirt-8.0.0-90.g4f8dd1cb01.ky10.x86_64ARM KY10 SP3 4.19.90-52.48.v2207.ky10.aarch64qemu-6.2.0-906.g271454a05e.ky10libvirt-6.2.0-415.gf2c25be909.ky10.aarch64KY10 SP3.2403 4.19.90-89.25.v2401.ky10.aarch64qemu-6.2.0-1042.g7eecd245dd.ky10libvirt-6.2.0-463.g2ee090fe60.ky10.aarch64H22e 5.10.0-136.12.0.86.oe2203sp1.aarch64qemu-6.2.0-906.g271454a05elibvirt-6.2.0-415.gf2c25be909.aarch64 - The virtual machine boot mode must be set to UEFI.
- The virtual machine operating system must support the TPM 2.0 specification. Operating systems that do not support TPM 2.0 (including but not limited to Windows Server 2012 and earlier, CentOS 6 / RHEL 6, Ubuntu 14.04 and earlier) are not supported.
- Before you add a TPM to an existing virtual machine, power off the virtual machine.
Procedure
- In the navigation pane, select .
- In the resource tree, right-click the target cluster, host, or image, and then click New Virtual Machine.
- In the Select VM Creation Method dialog, select New VM, and then click Next.
- In the New Virtual Machine dialog, complete the relevant basic configuration. For more information about virtual machine parameters, see Create a New Virtual Machine.
- In the Advanced Settings section, click Boot Options and select UEFI as the virtual machine BIOS mode.
-
In the Hardware Info section, click .
After the TPM is added successfully, click TPM in the hardware list. You can view the TPM status and specification in the hardware configurations pane on the right.
- After you confirm the configuration details are correct, click OK.